
The banner for your club website will be the first thing your members see when they arrive at your homepage. You can design this banner to be an introduction to the club, or the lead in to a recent news article. You can also choose the Image that will appear at the top of each page on your club website.
To edit the Banner, click on Website on the left-hand side menu and select Banner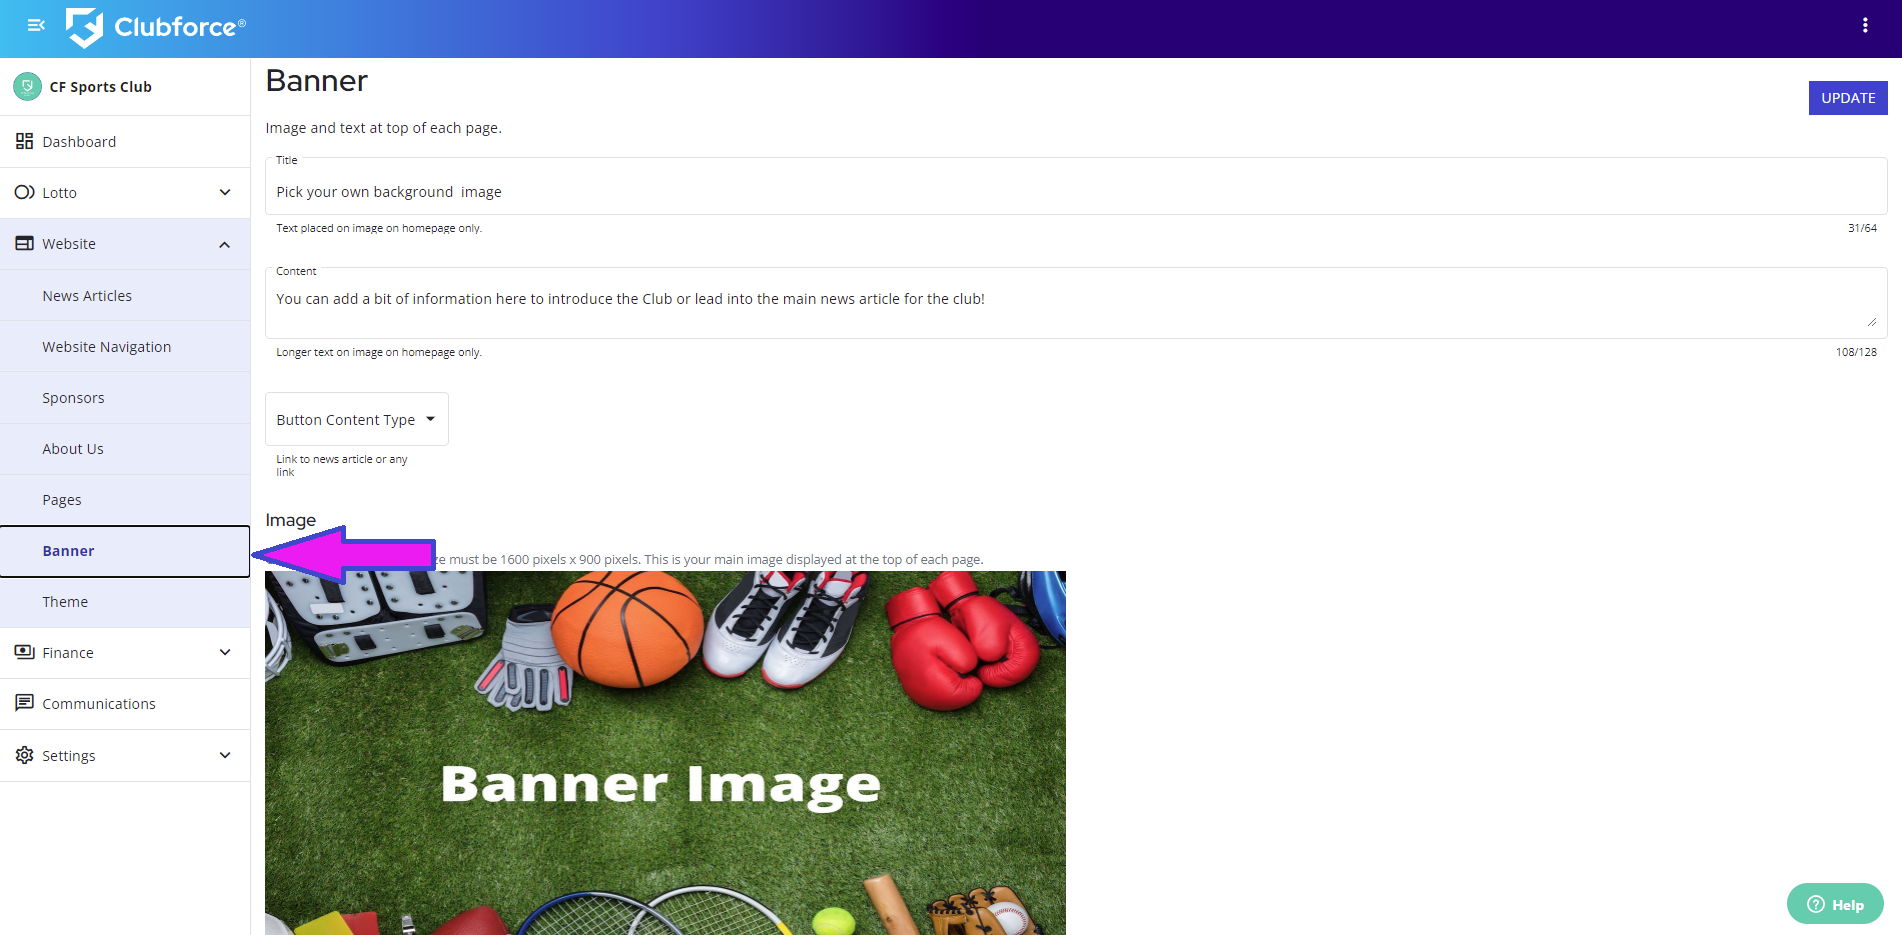
The title will be the text that appears on the banner. It can be accompanied by additional content underneath, providing more information on either the club or a linked news article.
Below, you will have a drop-down menu titled Button Content Type. If you would like to have a banner that retains the static image you’ve uploaded, and the text you’ve set in the fields above, then you will choose No Button.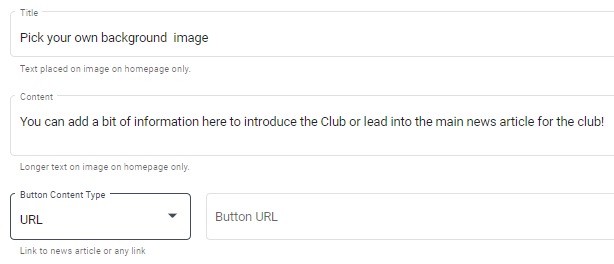
If you want the banner to redirect to another website, when members click on it, then you will select URL. You will be able to input a URL in the field beside when choosing this option.
The last option is Article. You can choose to have the banner redirect to an article you have created on your website.
You will be able to choose the article you want to redirect to in a drop-down menu that appears after selecting this option. 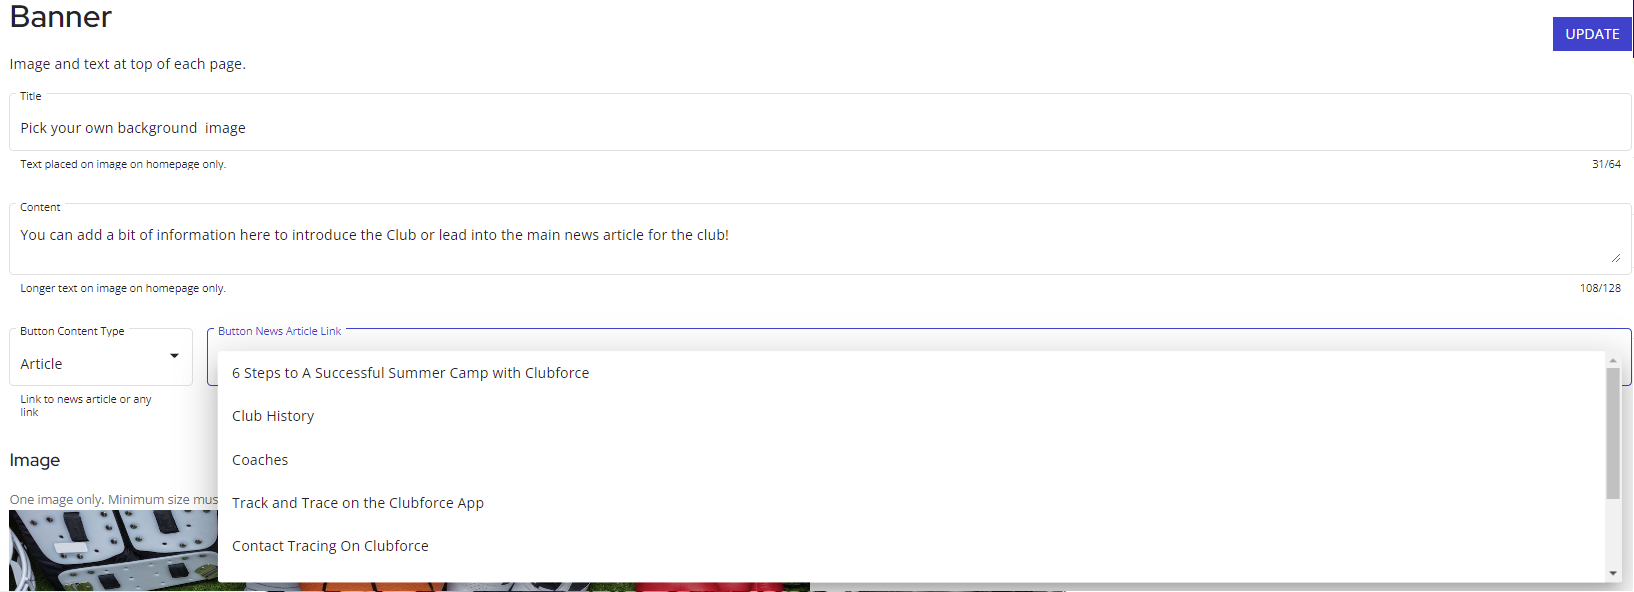
The final aspect of the Banner is the Image you want to use. A generic image may already be in place but you can choose to replace this by clicking the blue Replace Image button.
Simply click upload image to choose the image you want to add. If the image you are adding does not fit the required parameters, a menu will appear asking you to crop the image you want to update. Once you are happy with this, click the blue Done button to save the image.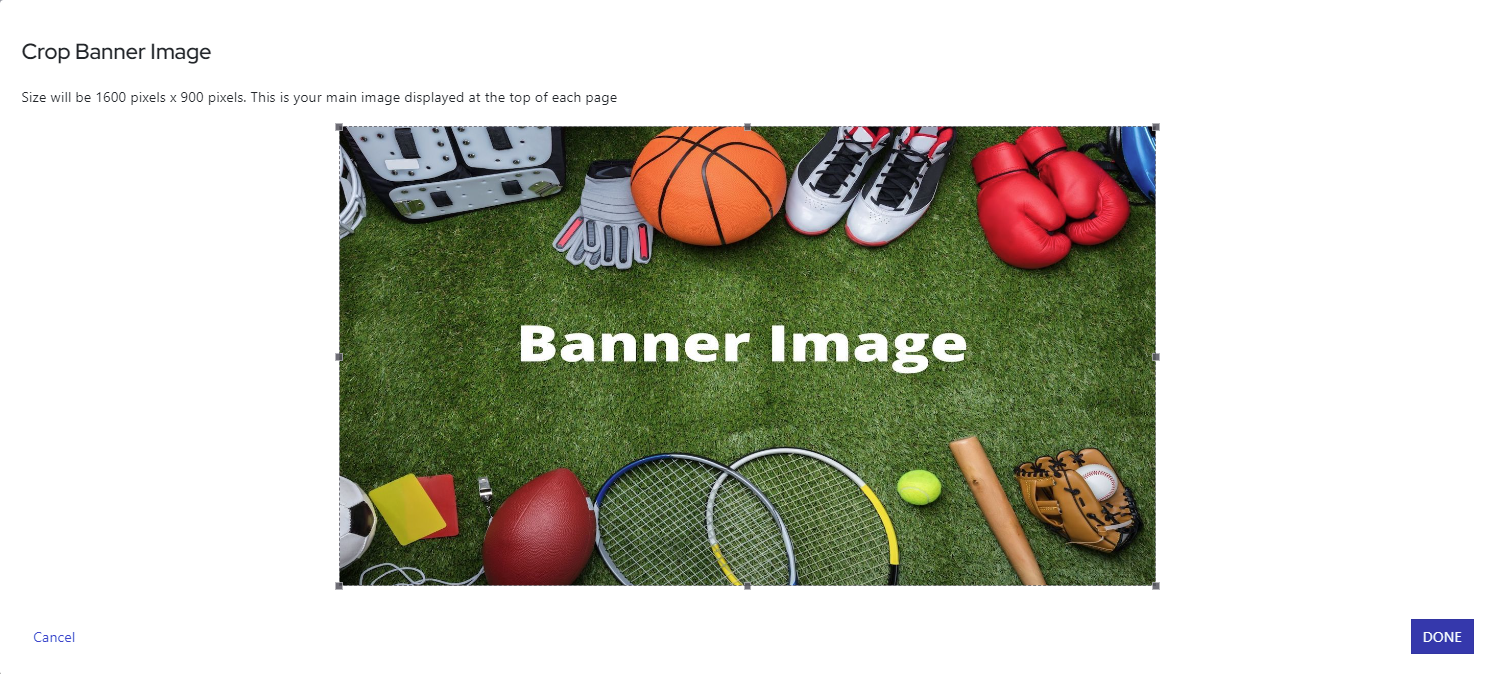
To finalise the Banner settings you have selected, click on the blue Update button in the bottom right-hand corner to implement the changes on your website.
To view a full step-by-step interactive tutorial, click on the link below
Comments
0 comments
Article is closed for comments.